Why Do I Need to Resize Photo Dimension?
Your average digital camera or smartphone will take a photo and store it in quite a large resolution (large dimension) e.g. 3,000px on the longest side. So what does that mean exactly? Consider the size of your computer or laptop screen (you can check this in your computer settings). The resolution on my laptop for example is 1366px x 768px and that’s pretty typical for a smaller laptop screen. Now let’s consider that average photo sizes can be 5,000px wide. That’s WAY bigger than my laptop screen, and therefore much bigger than it actually needs to be.
Image Dimension vs Image Size
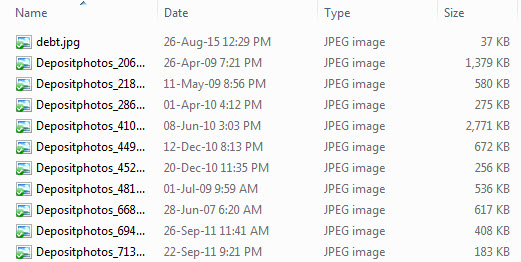
Image dimension is width x height and is always referred to as ‘size’ which is slightly misleading. The image size is actually the file size which can be easily seen in Windows explorer as shown in the example below. When you change the dimensions of a photo to make it smaller, this also makes the file size smaller. A typical photo taken on your smartphone might be 3MB whereas a resized photo might be just 200KB (more about this below).
Why is it Important to Resize Photos?
How many times have you visited a website and got fed up waiting for the page to load, so you left? Slow loading websites usually mean that the page size is too big and it therefore takes a long time for all the elements of the page to load.
Now imagine if you have a page showing 10 photos that you didn’t resize and the average size of the photo is 3MB. That’s 30MB worth of photos that you have to sit waiting for. Now if you resize your photos to approx 300kb per photo then that’s 3mb for all of your photos combined, which is going to be a LOT faster to load when someone is viewing your website.
Slow loading websites are even SLOWER when you view them on the tiny screen of a smartphone. Bear in mind that these days more than half of your website visitors might be viewing your website on a smartphone.
It’s not just your user’s experience of your website loading speeds that matters: loading speeds play a direct role in how your website is ranked by Google. Slower loading websites are penalised and appear lower down the search results.
What is a Suitable Image Dimension Size Photo for a Website?
Small Photos Dimensions
If my laptop screen is 1366px (I’m just using this as an example) then a photo which spans the width of my laptop would be 1366px wide. We would want an e-Commerce product photo to occupy approx 1/3 of the width of the page, which for my laptop would mean a product photo width of 455px. Therefore we’d resize the photo to 450px or 500px width, ready to use on your website.
If you have a standard website and you’d just like to show large-ish photos along with your text, you might want to set the longest side of your photos to 500px (test this size to see what that size looks like and adjust your future resizing accordingly).
Banner Photo Dimensions
Banner photos span the entire width of the website and are often used for short marketing copy and CTA buttons. Bearing in mind that some iMacs are pretty big, you’ll need to have a larger photo to accommodate for those larger screens. I normally resize banner photos to 2500px wide, although you should test this size after placing it on your website to make sure that no quality is lost on larger screens. This may be the case if you have a very detailed photo.
Product Photo Dimension Sizes
How to Allow for Product Zoom
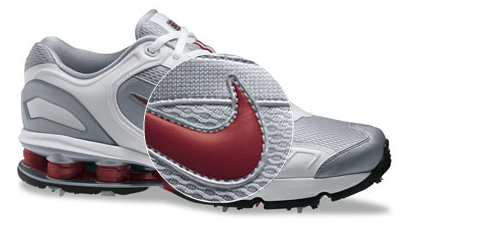 Taking the above example of a product photo on my laptop, where the product photo is 455px wide, we need a photo which is X times bigger than that to allow for a zoom. Let’s say you want your zoom to show an image which is three times bigger than the standard image: that means the image for the zoom must be 3 x 455px = 1365px wide. If you want your product image to zoom to show an image twice as big as the standard image then your product images need to be 2 x 455px = 910px. It stands to reason that if you use a product image that is narrower, the same width, or slightly larger, then the zoom will not work as there’s nothing to zoom in on.
How to Optimise Image Dimensions
How to Batch Resize Photo Dimensions (Windows)
Please note that this is only available for Windows computers!
Step 1
- Download and install FastStone Photo Resizer which is free and can be used for resizing and adding watermark logo in batches: FastStone Photo Resizer.
- Launch FastStone Photo Resizer and you’ll see a window like the one below.
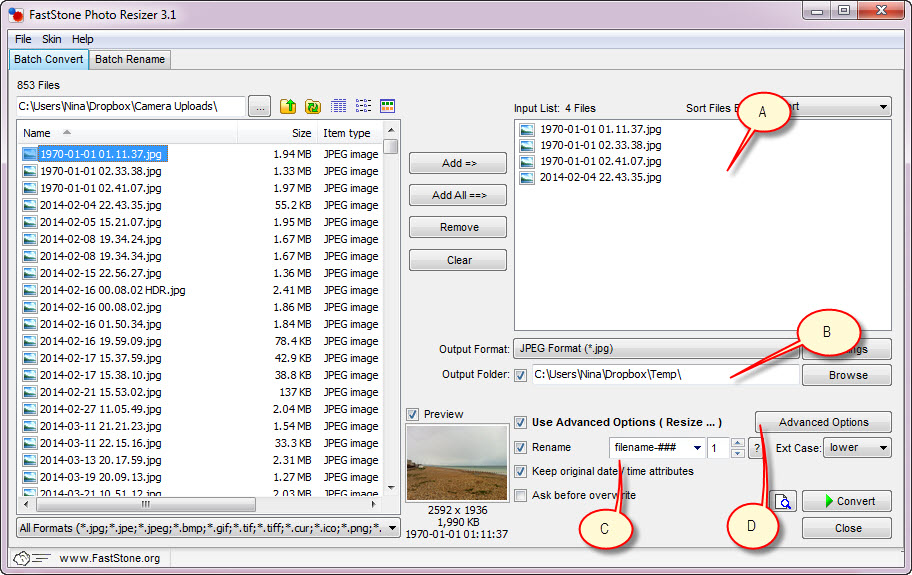
A. Navigate to where your photos are on the left and then use the buttons in the middle to add selected (or all) photos to the window on the right.
B. Choose to save your edited photos in a different folder (or uncheck to save them in the same folder).
C. You can re-name your photos which is always a good idea for easy management in your website. In the example above the first photo will be renamed filename-001 and the second photo will be renamed filename-002 and so on.
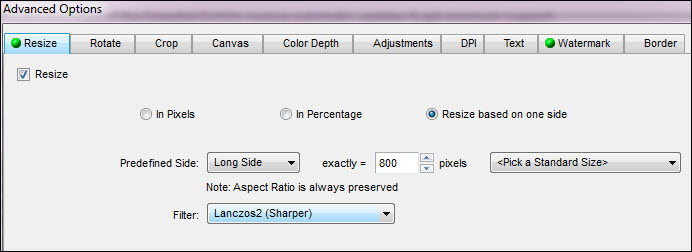
D. Click the ADVANCED OPTIONS button to get to the all the resizing and watermark options (check step 2 below).
Step 2
1. Choose to resize your photos so that the longest side is 800px. This is a standard size we use on all of our website projects and will suit most requirements (unless you want to use a zoom feature on eCommerce products then you should resize to approx 1500px).
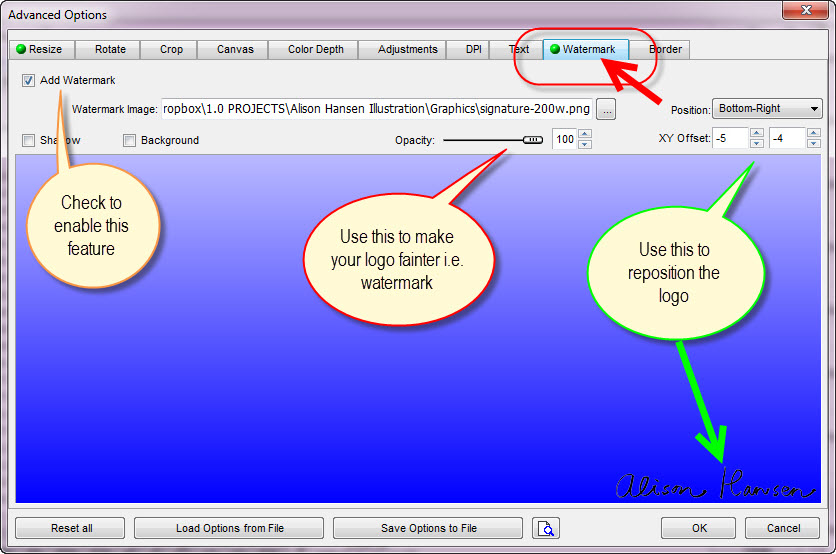
2. Add a watermark if required. Why would you want to do that? You can use it to make copying your images more difficult and/or you might want to let people know where to find your product if they only see your photo e.g. if someone has copied and pinned it on Pinterest.com and there’s no link to your website anymore. Potential customers who love your product would otherwise have no way of knowing where they could buy it from.
3. Now click on OK at the bottom and you’ll return to the default window. After you’ve set everything then click CONVERT at the bottom. You’ll see a confirmation along with a log reporting how much space you saved by resizing the files (smaller filesizes means faster page loading speeds).
You can use the newly saved files in your website either via the standard text editors OR if you’re replacing existing photos then you’ll want to do this directly using FTP (Elan Creative clients can ask us to assist if they’re not sure).
How to Batch Resize Image Dimensions (Mac)
Step 1
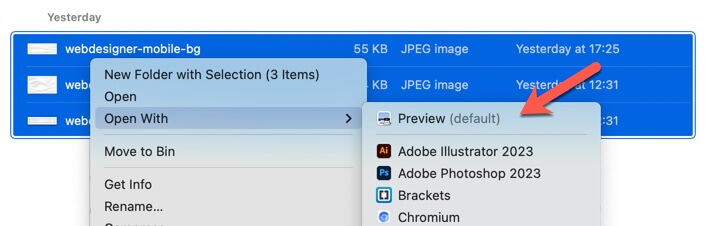
Select all the images you want to resize and then choose Open With > Preview
Step 2
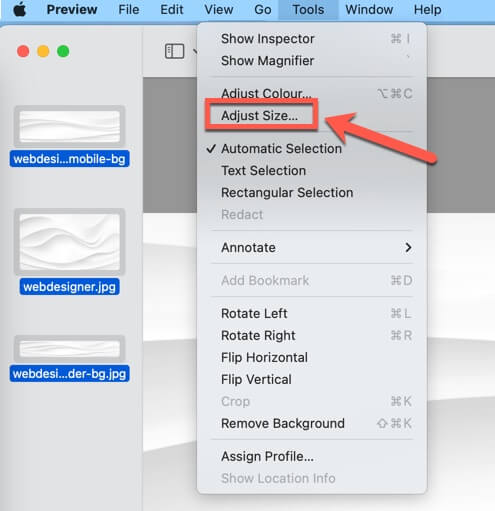
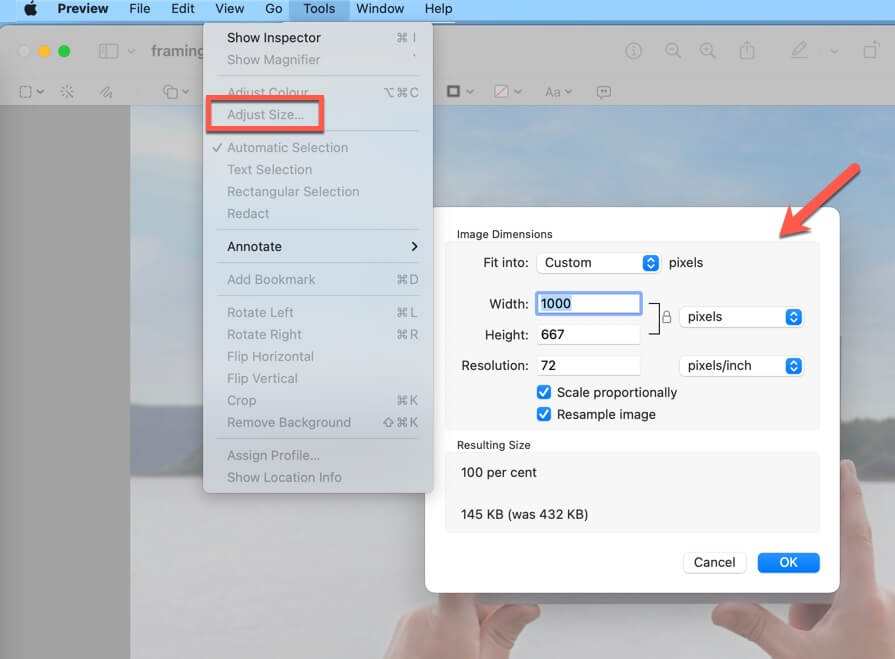
Select ALL of the images by using Control + A in the preview window. All of the items should show they are selected as the screenshot below. Then go to Tools > Adjust Size…
Step 3
Choose the desired size and then click OK. Once the resize has finished, close Preview. If you’re prompted to save the changes, choose yes.
How to Optimise Image File Size
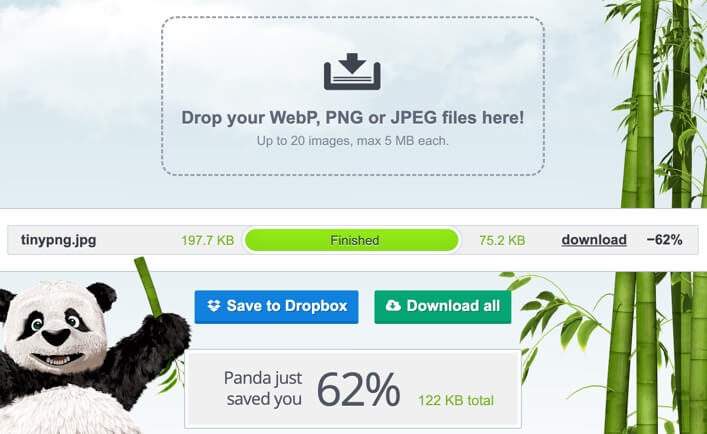
Now that we’ve resized the image DIMENSION down to the right size, it’s time to COMPRESS the image so that the file size becomes a lot smaller. This image below was 197.7 KB in size which is pretty small anyway. I’ve seen clients upload and use photos over 5 MB so many times, and this is really a massive file size which will really slow your pages down.
Over the years I’ve tried and tested many image compression tools and TinyPNG is by far the best. It doesn’t result in quality loss like some tools, which can leave your images fuzzy and unprofessional looking.
In the example below you can see I have compressed my image which resulted in a final file size of just 75.2 KB which is a compression of 62%. Impressive!
To use this FREE tool simply go to https://tinypng.com/ and drag and drop your images. Once they’re compressed you can download them. Before doing so, delete the original image on your computer. That way you’ll end up with only compressed images which are ready to use, and you won’t accidentally use the uncompressed ones.
That’s it! We’ve shown you how to optimise photos for websites while keeping them crisp and high quality. We did this by 1. resizing dimensions and 2. compressing the file size. You’re now ready to use your optimised photos on your website. Tell us what you think or post your questions in the comments below. Thanks for reading!

0 Comments